
Hello Again!
I know it has been a while since I have posted on the blog. Life has been crazy, hectic but I finally feel like things are slowing down. I am excited because I can finally get back to sharing all my fun projects with you. So here we go.......
My Halloween Table
Sadly, I don't have a mantel on my fireplace to decorate. So instead, I decorate the area at the top of the stairs in our living room.
I have the whole wall to decorate. A nice blank slate to work with.
I have the whole wall to decorate. A nice blank slate to work with.
I had planned to decorate last year but never found the time. This year I was determined to get it done. Here is the finished product.

(I love it, don't you?)
Here is the breakdown of what I did......
Only a few of the items were purchased and untouched.
The first was the clock.

I purchased this clock last year at Ross, on clearance, for $6.
It was a perfect fit for Halloween. The clock does work, but I left the battery out and put it on Midnight. Since that is when the ghosts and goblins come out.
Also, this sign.

Normally I would make my own, but I couldn't resist this one.
It was 75% off after Halloween last year, which made it only $2.
You know me, I can't pass up a deal like that.
Here are the items that I either refreshed or are homemade.
#1... was the Witches Hat. This cute little hat my Mom found at the Goodwill.
It was old and needed some love.
Here is what it looked like before:

I removed the flower buds and ribbon.
Gave it a fresh coat of paint and added a new bow.
I had to keep "The Witch is in!" tag. It was too cute not to.
Here is what she looks like now....

Quick and easy project.
#2.... My Framed E-E-K letters.
This was another quick and easy project.

I found a font that I liked. (I am a free font junkie!)
The font I picked for this one is called Belshaw. You can download it for free here!
Then all I did was cut out 3 pieces of fabric to fit the frames. Traced the letters onto the fabric.
I then used a Sharpie Paint Pen to color in the letters.
(you can find them at any craft store)
Placed them in the frames and DONE!!!
#3.... The once Silver Serving Platter
Here is a quick breakdown of the platters transformation.


I bought this platter at the Goodwill for $2. Painted it with black chalkboard paint.

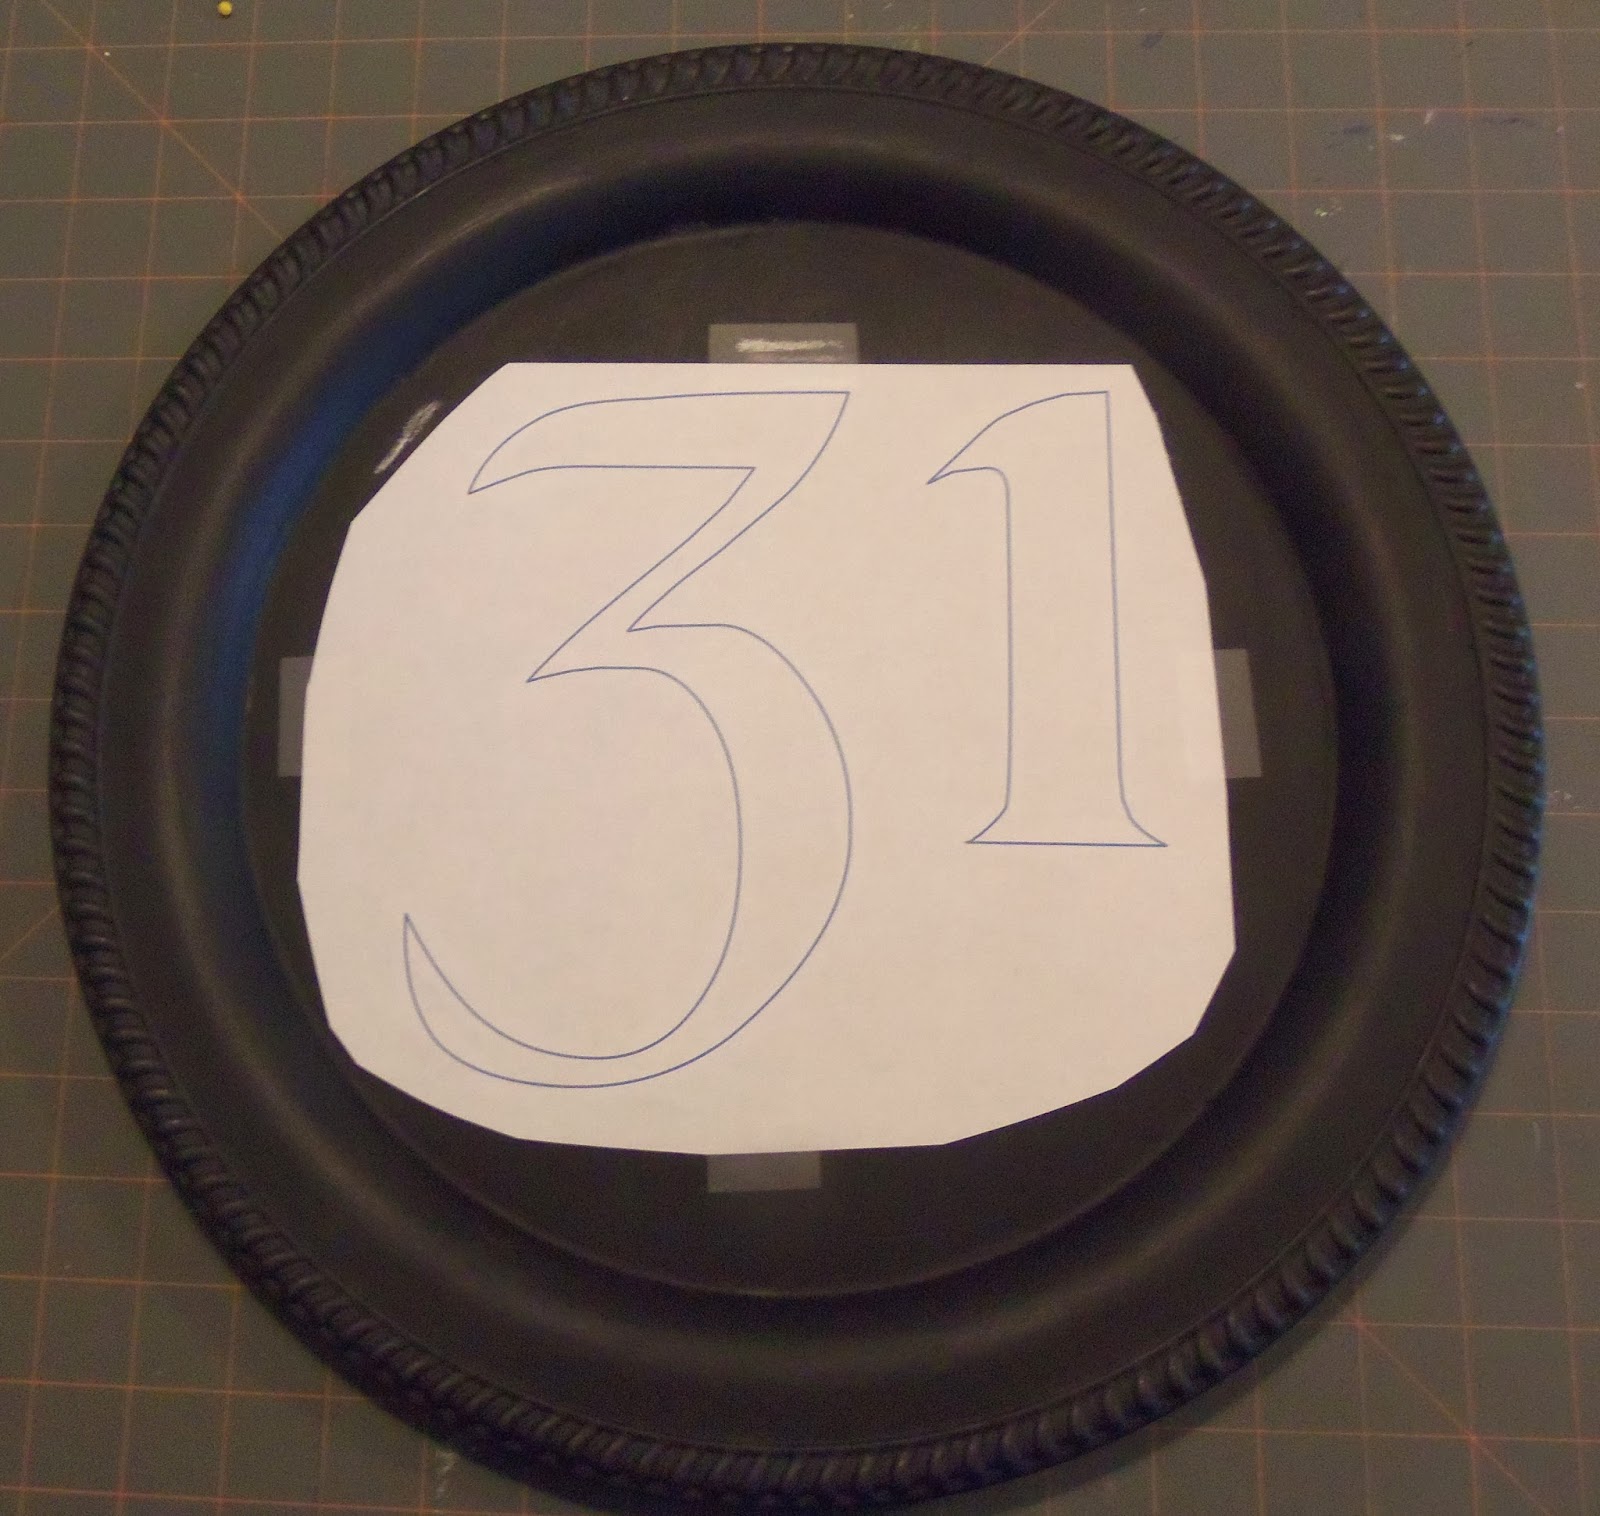

Found the numbers that I wanted. Traced them onto the platter.
Painted the numbers with some white craft paint and......
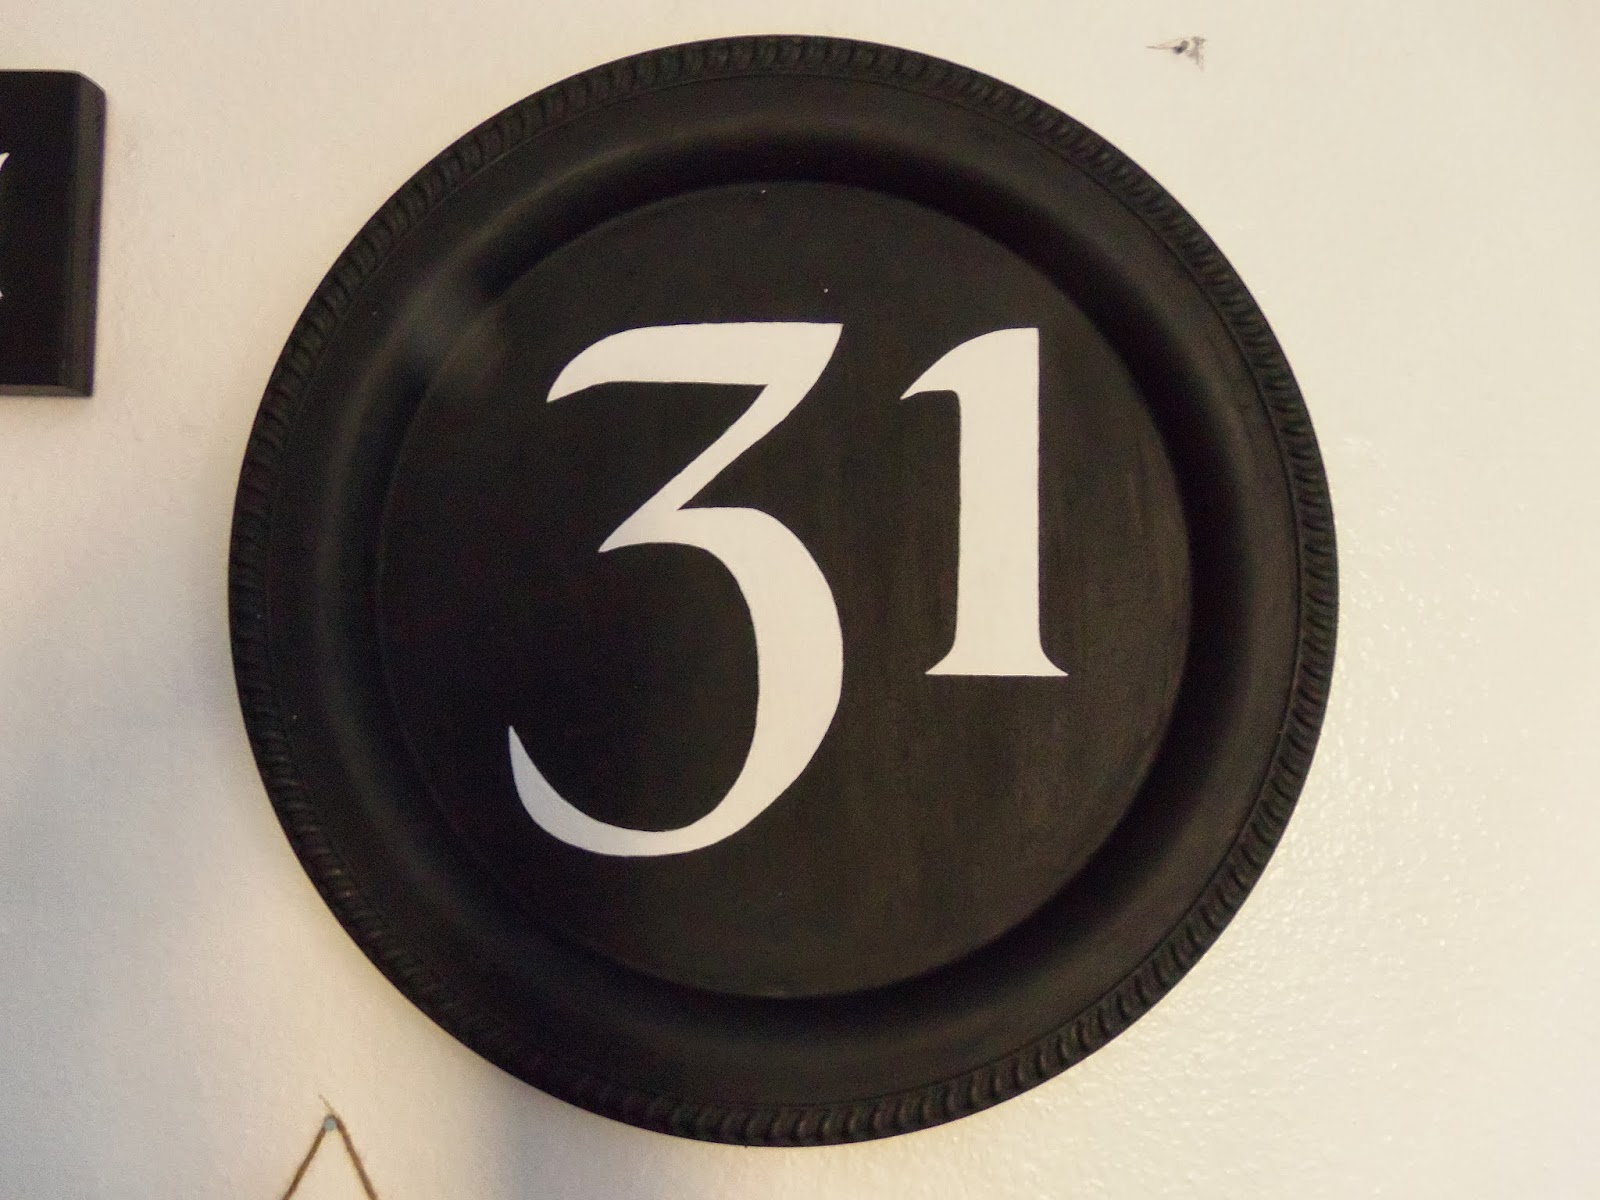
DONE!!!
#4..... The Witches Books
I went to the thrift store and bought some old books.
I painted them with some black chalk paint, found a font I liked, and traced it on to the bindings of the books.
I painted them with some black chalk paint, found a font I liked, and traced it on to the bindings of the books.

Then carefully painted the letters with some off-white craft paint and......

(Oh, and added a little bottle of Witches Potion I purchased at Joann's.)
I think they are the perfect addition to my table.
#5 A few hand painted signs.....


I love to make signs out of old salvaged wood and have come up with an easy way to do them.
(tutorial coming soon)
#6 My Favorite Project of them all....
The Fabric Pumpkins


I love the way they turned out. It was so simple and easy.
For the tutorial on how to make these little pumpkins, click here !!
#7 To finish it off....
I added this little bat table runner and a couple black crows that I picked up at the dollar store.


I couldn't be happier with the end result.


HAPPY HALLOWEEN!!!
Have a safe and fun Holiday!!! Trick or Treat!
How do you decorate for Halloween? Do you go cutesy or scary and spooky?
No comments:
Post a Comment